Table of Contents
ToggleChoosing art for a living room isn’t about matching throw pillows. It’s about creating a focal point, setting the tone for the entire space, and making it feel intentional. The right piece can unify mismatched furniture, draw the eye upward in rooms with vaulted ceilings, or add warmth to a minimalist setup. Whether working with rental-friendly solutions or planning a full gallery wall, understanding proportion, placement, and personal style makes the difference between decoration and design.
Key Takeaways
- Scale matters most when selecting living room art ideas—pair a 96-inch sofa with artwork that spans 60–72 inches wide or use matching grouped pieces to achieve proper proportion.
- Hang art with the center at 57–60 inches from the floor for optimal eye-level placement, and maintain 6–8 inches of clearance between furniture tops and frame bottoms to create visual balance.
- Gallery walls work best with consistent spacing (2–3 inches between frames) and proper planning using kraft paper templates, which prevents costly installation mistakes and allows for intentional design.
- For heavy artwork over 20 pounds, locate studs with a stud finder and use 2.5–3-inch wood screws—avoid plastic expansion anchors that fail under sustained load.
- DIY living room art projects like framed wallpaper samples ($5–10 each), paint-by-number canvases, or photo enlargements ($15–30) deliver custom looks without major financial commitment.
- Textured and mixed-media pieces such as macramé, fiber art, or reclaimed wood elements introduce tactile interest and align with modern biophilic design trends in contemporary interiors.
How to Choose the Right Art for Your Living Room
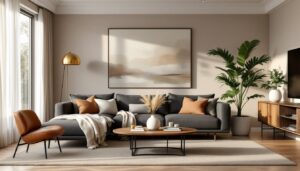
Scale matters more than style. A small 8×10 print above a sectional looks lost. For wall spaces above sofas or consoles, aim for artwork that spans two-thirds to three-quarters of the furniture width. A 96-inch sofa pairs well with a single piece around 60–72 inches wide, or a grouping that reaches that combined dimension.
Consider ceiling height and wall color. In rooms with 8-foot ceilings, vertical pieces can add perceived height. In spaces with taller ceilings (10 feet or higher), horizontal or large-scale works prevent walls from feeling empty. Dark walls absorb light and benefit from art with lighter tones or metallic accents: light walls offer more flexibility but can make bold colors pop.
Match the room’s function and formality. Living rooms used primarily for entertaining lean toward statement pieces or curated collections. Spaces doubling as media rooms or casual hangouts can handle more playful or eclectic art. If the room already has patterned textiles, geometric rugs, or busy furniture, simpler art with clean lines balances the visual load.
Lighting changes everything. Natural light can wash out pastels or cause glare on glossy finishes. Track lighting or picture lights allow flexibility for art placement without depending on window position. LED strips with adjustable color temperature (2700K–3000K) mimic warm gallery lighting and won’t fade prints over time like halogen bulbs.
When planning design and layout decisions, art should be one of the last elements added, after paint, flooring, and major furniture. This prevents buying a piece that clashes with the final palette or competes with architectural details.
Statement Wall Art Ideas That Make an Impact
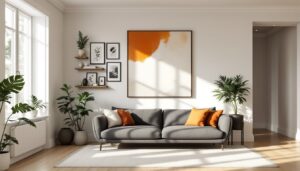
Oversized canvas or framed prints work best on uninterrupted walls, those without windows, doors, or built-ins. A single piece measuring 48×60 inches or larger anchors the space without additional decor. Stretch canvas offers a frameless, contemporary look: wood or metal frames add structure and suit traditional or transitional interiors.
Large-scale photography brings texture and depth. Black-and-white landscapes, architectural shots, or abstract macro images scale up without losing detail. For living rooms with neutral palettes, a single dramatic photograph in a float frame (where the print sits slightly forward from the backing) adds dimension.
Textured or mixed-media pieces introduce tactile interest. Fiber art, macramé wall hangings, or relief panels made from wood or metal catch light differently throughout the day. These work especially well in modern or bohemian spaces where flat prints might feel too formal. In homes following current design trends, natural materials like jute, rattan, or reclaimed wood align with biophilic design principles.
Triptychs and diptychs offer the scale of a single large piece with built-in visual breaks. Three panels, each 24×36 inches, hung with 2–3 inches of spacing, create a cohesive 72-inch-wide display. This format suits contemporary interiors and allows for easier transport and hanging than one massive frame.
Mirrors as art serve dual purposes. An ornate vintage mirror or a cluster of geometric mirrors reflects light and makes smaller living rooms feel more expansive. Hang them opposite windows to maximize natural light, but avoid placing them where they’ll reflect clutter or create distracting sight lines.
Gallery Wall Layouts and Arrangement Tips
Plan on the floor first. Lay out all frames and measure the total footprint before putting a single nail in the wall. Use kraft paper templates taped to the wall to visualize spacing and alignment. This step prevents unnecessary patching and repainting.
Grid layouts suit matching frames and uniform matting. Space frames 2–3 inches apart for a clean, museum-style presentation. This works well in formal living rooms or spaces with strong architectural lines. All frames should align on a horizontal and vertical axis, use a laser level, not just a tape measure and eyeballing.
Salon-style walls embrace varied frame sizes, orientations, and styles. Start with the largest piece at eye level (typically 57–60 inches from the floor to the center of the frame), then build outward. Keep the outer perimeter relatively straight, irregular edges look unintentional. This approach suits eclectic or maximalist interiors and allows for growth over time.
Themed or color-coordinated groupings unify mismatched frames. Black-and-white photos in different frame styles still read as cohesive. Similarly, colorful art in identical black frames creates rhythm without monotony. If mixing frame finishes (brass, black, natural wood), repeat each finish at least twice to avoid a one-off looking accidental.
Spacing and symmetry guidelines: For salon walls, maintain consistent gaps between all frames, even if the frames themselves vary. A 2-inch gap universally applied looks intentional. For symmetrical arrangements, use a center vertical axis and mirror placement on both sides.
When mastering arrangement techniques, remember that gallery walls work best on walls at least 8 feet wide. Narrower walls benefit from a single statement piece or a simple vertical stack of two to three frames.
Budget-Friendly DIY Art Projects for Your Living Room
Framed fabric or wallpaper samples cost pennies compared to custom art. Purchase 12×12-inch or 18×18-inch designer wallpaper samples (often $5–10 each) and mount them in basic frames from discount retailers. This approach allows frequent rotation without the commitment of permanent wallpaper installation.
Paint-by-number or abstract DIY canvases give a custom look for under $50. For abstract work, use a 24×36-inch pre-stretched canvas, acrylic paints in three coordinating colors, and painter’s tape to create geometric blocks or stripes. Metallic gold or copper accents elevate the finished piece. No artistic skill required, color blocking and clean tape lines do the work.
Photo enlargements from personal images beat generic stock prints. Many online print services enlarge high-resolution photos to poster size (24×36 inches or larger) for $15–30. Architectural details, travel shots, or nature photography printed large and framed simply look intentional. Mount on foam core for rigidity if skipping glass to save cost.
Floating shelves as art displays offer flexibility. Install a 48-inch picture ledge and rotate smaller framed prints, leaned canvases, or a mix of art and objects. Use two 3-inch wood screws into studs for each shelf bracket, drywall anchors alone won’t support the weight once loaded with frames. This works well for renters or anyone who likes frequent changes.
Botanical pressings and specimen art bring nature indoors. Press leaves, ferns, or flowers between parchment paper and heavy books for two weeks, then mount them on cardstock and frame under glass. A series of three to five small frames (8×10 inches each) creates a naturalist-inspired gallery.
For those just starting their design journey, DIY projects allow experimentation without major financial risk. If a piece doesn’t work, it’s easy to repaint, reframe, or replace.
Creative Alternatives to Traditional Framed Art
Floating shelves with layered objects combine art with three-dimensional items. Mix small framed prints with sculptural pieces, plants, or ceramics. This approach works well above consoles or media units where purely functional storage isn’t needed.
Large woven wall hangings or tapestries add warmth and acoustic softening. In living rooms with hard surfaces (tile, hardwood, plaster), textiles reduce echo. Hang using a wooden dowel or curtain rod slipped through a sewn pocket at the top, more polished than thumbtacks. Secure the rod to the wall with two L-brackets screwed into studs.
Plate walls or vintage collections suit traditional or farmhouse interiors. Use disc hangers (wire brackets that hook onto plate edges) rather than adhesive hangers, which can fail over time. Space plates 3–4 inches apart and vary sizes for visual interest. Properly installed disc hangers rated for the plate weight prevent damage from falls.
Architectural salvage as wall art brings character. Vintage shutters, reclaimed wood panels, or antique window frames mounted directly to the wall serve as sculptural elements. When hanging heavy salvage pieces, locate studs with a stud finder and use 3-inch lag screws or toggle bolts rated for the weight. Surface-mounted drywall anchors will fail with anything over 20 pounds.
Chalkboard or corkboard panels add function. A 3×4-foot framed chalkboard becomes rotating art space and message board. Use actual chalkboard paint rather than cheap alternatives, it takes chalk better and erases cleaner. Frame it with 1×3 pine trim and a coat of semi-gloss paint for a finished look.
According to design experts at Dwell, unconventional materials and statement pieces reflect the shift toward personalized, lived-in spaces rather than catalog-perfect rooms. The goal is authenticity, not perfection.
Placement and Hanging Tips for Perfect Display
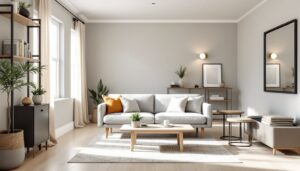
The 57-inch rule applies to most art. Hang pieces so the center sits 57–60 inches from the floor, the average human eye level. For art above furniture, leave 6–8 inches of clearance between the furniture top and the frame bottom. More than 12 inches creates a visual disconnect: less than 4 inches makes the art feel cramped.
Stud-mounted hanging for anything over 20 pounds. Locate studs with a stud finder (electronic models cost $15–30 and eliminate guesswork). Use 2.5–3-inch wood screws driven directly into studs for heavy frames. For pieces between studs, use toggle bolts or molly bolts rated for the frame weight, not plastic expansion anchors, which pull out under sustained load.
Picture hanging wire and D-rings for frames under 20 pounds. Install D-rings one-third of the way down from the top of the frame (not halfway, this causes the frame to tilt forward). String braided picture wire between the rings with enough slack that it sits 2–3 inches below the top edge when pulled taut. This allows the wire to catch securely on a wall hook without showing above the frame.
Level every piece, even in salon walls. A small torpedo level (6–9 inches) sits on top of the frame during installation. Check level after driving the first screw, adjust, then drive the second. Skipping this step is the most common DIY mistake, the human eye catches even a 2-degree tilt.
Command strips for rental-friendly or lightweight art. Heavy-duty strips hold up to 16 pounds per set when applied correctly. Clean the wall and frame back with rubbing alcohol first, press firmly for 30 seconds, then wait one hour before hanging. Don’t exceed the weight rating, failures usually result from overloading, not product defects.
When determining functional room purpose, art placement should respond to sightlines. Hang pieces where they’ll be seen from main seating areas, not tucked behind furniture or in corners.
Avoid common mistakes: Don’t hang art too high (“gallery height” in commercial spaces doesn’t translate to homes with lower ceilings). Don’t use sawtooth hangers on frames over 10 pounds, they’re flimsy and unreliable. Don’t cluster unrelated art sizes without planning, measure and template first.
Design ideas from sources like MyDomaine emphasize that proper installation matters as much as the art itself. A beautiful piece hung poorly undermines the entire effort.
Conclusion
Art transforms living rooms from functional spaces into personal statements. The difference between a room that feels finished and one that feels incomplete often comes down to thoughtful wall decor. Focus on scale, placement, and pieces that reflect actual interests rather than chasing trends. Whether investing in statement works or building a gallery wall from budget finds, the goal is a space that looks intentional and feels lived-in.